top of page

All Posts

A cracked bathtub, stained tile, or peeling vanity can make an otherwise functional bathroom feel neglected every time you walk in. This bathroom surface restoration guide helps you identify what can be renewed, what should be replaced, and how to get a clean, updated result without turning your home into a demolition zone.

For many homeowners, sellers, and landlords across New Jersey, Pennsylvania, Maryland, and New York, the goal is not a luxury gut renovation. It is a bathroom that looks fresh, feels hygienic, functions safely, and supports the value of the property. Surface restoration can often deliver that change faster and at a fraction of the cost of replacement.

Start With the Condition of the Surface

The right solution depends on more than appearance. A dated color is one thing; deep structural damage, active leaks, or unstable materials are another. Before choosing reglazing, repair, regrouting, or replacement, look closely at the condition of the tub, tile, cabinets, and countertops.

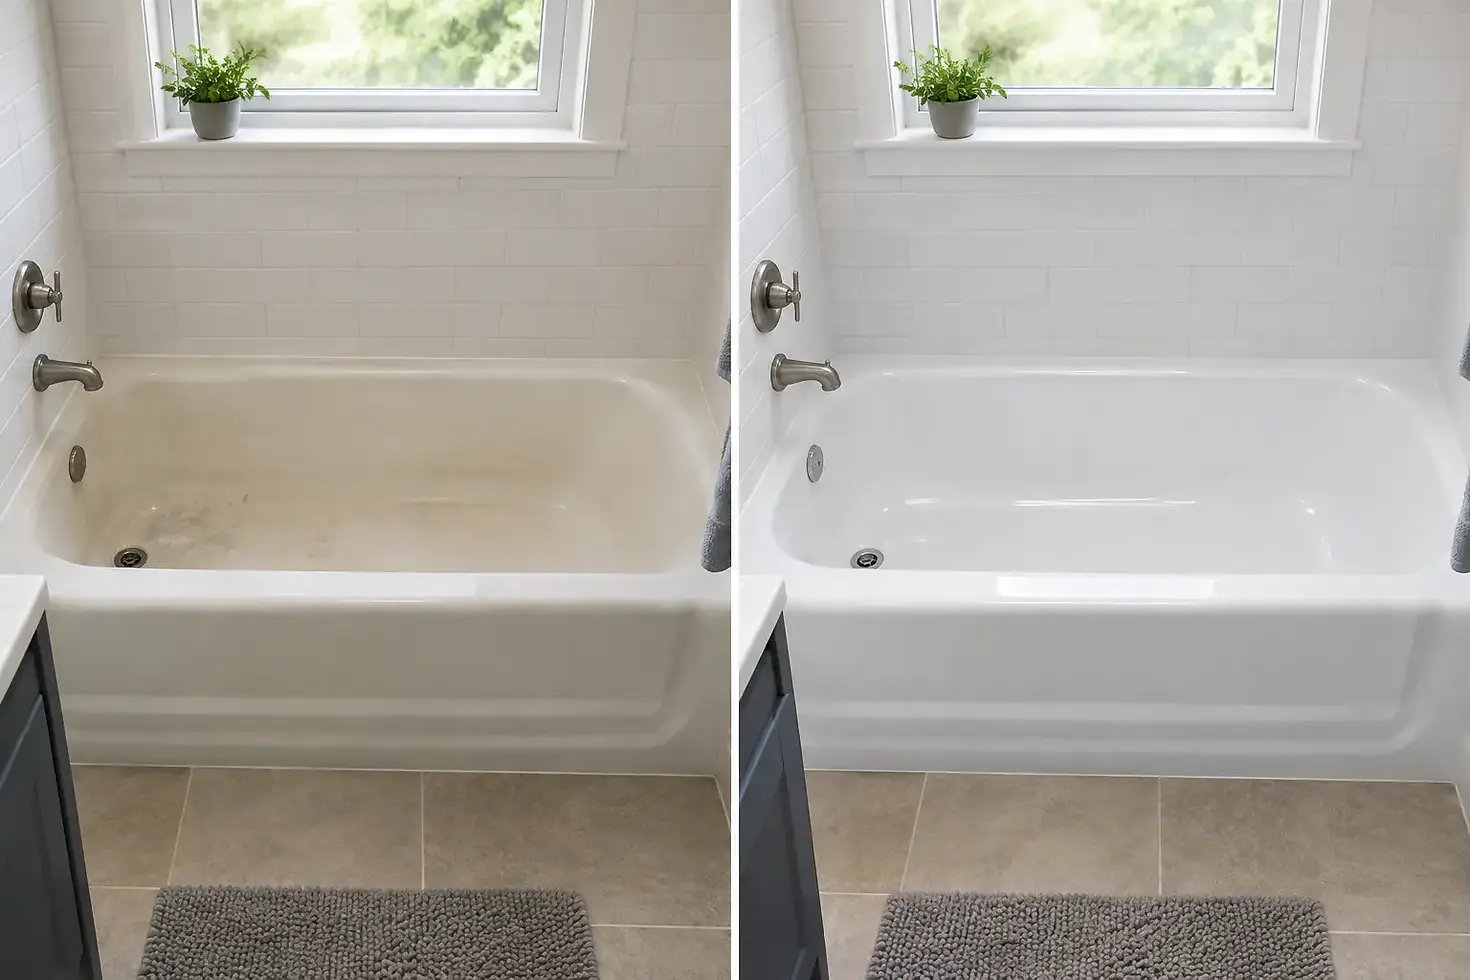
A bathtub with chips, scratches, dullness, rust spots, or light surface cracking is often a strong candidate for professional repair and reglazing. The same is true for ceramic tile that is sound and securely attached but has lost its shine, picked up stains, or looks locked into another decade. Reglazing creates a renewed finish over a properly prepared surface, giving the room a dramatic visual lift without removing the fixture.

Grout deserves a separate look. Dirty, missing, or cracked grout can make clean tile look unsanitary. Professional regrouting restores the lines between tiles, improves the finished appearance, and helps reduce places where moisture and grime can collect. If tiles are loose, water is getting behind the wall, or the subfloor has been damaged, surface work alone may not solve the underlying issue. Those conditions should be repaired before cosmetic restoration begins.

Cabinets and resin countertops can also be refreshed when the boxes and structure are in good shape. A worn finish, outdated color, or minor surface damage does not automatically justify ripping out usable materials. Refinishing preserves what is working while creating a cleaner, more current look.

When Restoration Makes More Sense Than Replacement

Replacement can be necessary, but it brings costs beyond the price of a new tub or vanity. Demolition, plumbing changes, disposal, wall repairs, flooring work, and extended downtime can quickly turn a small project into a major renovation. In older Northeast homes, opening up a bathroom can also reveal surprises that add time and expense.

Surface restoration is usually the practical choice when the existing fixture is solid, the layout works, and the main problem is wear rather than failure. It is especially useful for property owners preparing to sell or rent, where a bright, clean bathroom can change first impressions without overinvesting in a full remodel.

Restoration also reduces landfill waste by extending the useful life of tubs, tile, cabinets, and counters that do not need to be discarded. That is a real benefit, but the immediate advantage for most households is convenience. Less demolition means less mess, fewer disruptions, and a faster return to using the room.

Bathroom Surface Restoration Guide: Choosing the Right Service

Every bathroom has its own mix of surfaces and concerns. A professional assessment helps match the work to the problem rather than applying a one-size-fits-all fix.

Bathtub repair and reglazing

Bathtubs often show the bathroom's age first. Chips, worn enamel, discoloration, rust, and stubborn dullness can make a tub feel impossible to clean, even after scrubbing. Repairing damaged areas and reglazing the surface can give the tub a smooth, bright finish that makes the entire room look more cared for.

This is a particularly valuable option for cast iron, steel, and older fiberglass tubs that are still structurally sound. Replacing these fixtures may require wall tile removal and plumbing work, while reglazing focuses on renewing the tub already in place.

Tile reglazing and regrouting

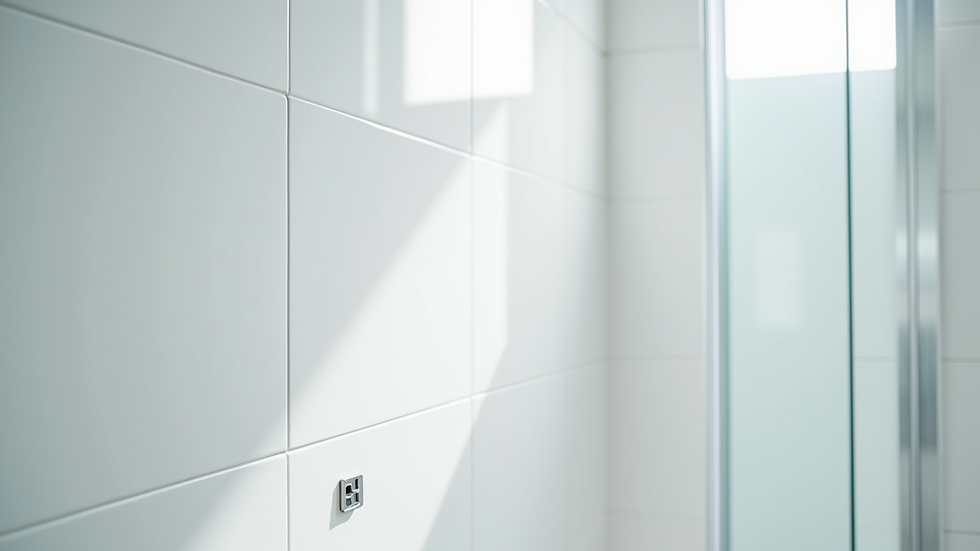
Old tile can be durable long after its color or finish has become dated. Reglazing can refresh the appearance of sound wall tile, while regrouting improves the joints that often collect stains and mildew. Together, these services can make a shower surround or bathroom wall look cleaner and more uniform.

It depends on the tile's condition. Loose tiles, crumbling backing, or moisture damage need correction first. But if the installation is stable, restoring it is often far more affordable than removing every tile and rebuilding the walls.

Cabinet and countertop refinishing

A vanity can make a bathroom look old even when the tub and tile are in good shape. Cabinet reglazing provides a practical way to update worn finishes and create a more coordinated room. Resin countertop refinishing can also improve a stained, scratched, or dated counter without the disruption of a full vanity replacement.

The best results come from considering the bathroom as a whole. A renewed white tub, clean grout, updated cabinet finish, and refreshed countertop can create a brand-new appearance without changing the room's footprint.

Tub-to-shower conversions

For households concerned about accessibility, a high-sided tub can become a daily obstacle. A tub-to-shower conversion can reduce step-over height, simplify cleaning, and make bathing more comfortable for older adults or anyone with mobility concerns.

This is one situation where function may matter more than preserving the original fixture. The right conversion can improve safety while still delivering the polished, updated look homeowners want.

What Professional Restoration Should Look Like

Lasting results begin with preparation. A surface cannot be properly refinished over soap residue, unstable coatings, loose grout, or untreated damage. Professional work involves cleaning, repairing chips or cracks where appropriate, preparing the surface for adhesion, and applying the new finish with attention to consistency and detail.

The process is designed to minimize disruption, but the bathroom will need to stay off-limits during the work and curing period. Plan around that downtime, especially if it is your only full bathroom. A reputable restoration provider should explain what to expect before work begins, including preparation, ventilation, cure time, and aftercare.

At Majestic Bathtub & Tile Reglazing, the focus is on practical transformations that help homeowners avoid unnecessary replacement while improving appearance, cleanliness, and everyday use. Before-and-after results matter because they show what a carefully restored surface can do for a tired room.

Protect Your Restored Bathroom

Once the work is complete, gentle care helps preserve the finish. Avoid abrasive powders, harsh scouring pads, and aggressive cleaners that can dull or damage refinished surfaces. Use non-abrasive bathroom cleaning products, a soft cloth or sponge, and regular light cleaning rather than waiting for buildup to become difficult to remove.

Good ventilation also matters. Run the exhaust fan during showers and leave it on afterward to reduce lingering moisture. Repair dripping faucets promptly, since constant water exposure can stain surfaces and weaken caulk over time. Keep shower caddies, bath mats, and accessories clean so they do not trap moisture against the tub or tile.

For rental properties, simple care instructions can help protect the investment and keep the bathroom showing well between tenants. For homeowners, the payoff is just as clear: less time fighting stains, fewer visible flaws, and a bathroom that feels clean when guests walk in.

Plan the Refresh Around Your Real Priorities

The best bathroom project is not always the largest one. If you need to prepare a home for sale, focus on visible improvements that create a clean first impression. If you manage rentals, prioritize durable repairs and easy-to-maintain finishes. If accessibility is the concern, start with safer bathing access and build the rest of the refresh around it.

A professional estimate can clarify whether your bathroom needs targeted repair, full surface refinishing, regrouting, or a tub-to-shower conversion. Bring up any leaks, soft flooring, loose tile, or recurring mold concerns early so the right work is planned from the start. With sound surfaces and the right restoration plan, the bathroom you avoid showing can become one of the rooms you are proud to use again.


A bathroom can feel dated long before it stops working. A chipped tub, stained tile, worn grout, or faded vanity can make the entire room look neglected, even when the plumbing and layout are perfectly functional. The good news is that a bathroom makeover on budget does not have to mean living with temporary fixes or taking on a demolition project. With the right priorities, you can create a cleaner, brighter, more modern space while keeping the fixtures you already own.

For homeowners, landlords, and sellers across the Northeast, the smartest updates are often the ones that deliver an immediate visual change with minimal disruption. Start with the surfaces people notice first, then add practical finishing touches that make the room feel intentional rather than patched together.

Start Your Bathroom Makeover on Budget With the Biggest Problem

Before buying decor or choosing a new shower curtain, take an honest look at what makes the bathroom feel old. In many homes, it is the tub or tile. A bathtub with scratches, chips, discoloration, or a dull finish can overpower every other improvement in the room. Old wall tile may be structurally sound but look impossible to clean because the finish and grout have absorbed years of wear.

Replacing a tub or tile surround can involve demolition, plumbing work, wall repair, disposal fees, and days or weeks without normal use of the bathroom. Refinishing is often a more cost-effective alternative when the fixture itself is in good condition. Professional bathtub reglazing restores the finish of an existing tub, while tile reglazing can update worn or outdated tile without tearing it out.

This approach also avoids sending usable materials to a landfill. It is not the right solution for every situation. A tub with severe structural damage, active leaks, major water damage behind walls, or unsafe plumbing may need repair or replacement first. But when the underlying fixture is solid, restoration can provide the dramatic before-and-after result most budget makeovers need.

Put Your Budget Where It Shows

A limited budget works best when it is focused, not scattered. Rather than replacing every item in the room, choose one major transformation and a few supporting updates. A restored white tub, for example, can make existing tile, flooring, and paint look better almost immediately.

Think in terms of visual impact. The bathtub or shower area, vanity, walls, lighting, and hardware set the tone of the room. Small accessories matter, but they cannot compensate for a stained tub or broken tile. Address the worn surfaces first, then use lower-cost changes to complete the look.

A practical order is to repair or refinish damaged fixtures, refresh the walls, improve lighting, and replace dated hardware. Once those larger details are handled, towels, mirrors, storage, and decor become the finishing layer instead of an attempt to hide bigger problems.

Restore Instead of Replace When You Can

Refinishing can make a major difference for tubs, tile, cabinets, and certain countertops. A yellowed tub can be renewed with a clean, bright finish. Dated tile can be refreshed in a more current color. Cabinets that are structurally sound but faded or scratched may benefit from cabinet reglazing rather than a full vanity replacement.

The value goes beyond appearance. Repairing cracks and chips can improve hygiene by removing damaged areas where grime tends to collect. A smooth restored surface is also easier to clean and helps a bathroom look cared for between deep cleanings.

For rental properties, this is especially useful. A clean-looking bathroom can improve tenant appeal without putting a full renovation budget into a unit that does not need new plumbing, new walls, and new fixtures.

Regrout for a Cleaner, Brighter Look

Grout has a bigger effect on a bathroom than many people expect. Darkened, cracked, or missing grout makes tile look older and can allow moisture to reach areas it should not. Tile regrouting is a targeted update that brings back definition between tiles and makes the whole wall or floor look fresher.

If tile is in good condition, regrouting may be enough to improve its appearance. If the tile finish itself is worn, stained, or stuck in an outdated color, reglazing and regrouting together can create a more complete transformation. The right choice depends on whether the problem is mostly in the grout lines or across the entire surface.

Use Paint and Light to Change the Mood

After the main surfaces are addressed, paint is one of the most effective budget-friendly tools available. A fresh wall color makes a bathroom feel cleaner, and it gives you control over the style of the room without replacing fixed elements.

For smaller bathrooms, light neutrals such as soft white, warm beige, pale gray, or muted blue can make the space feel more open. If your tub and tile are bright white, warmer wall colors can prevent the room from feeling cold. A deeper color can work well in a powder room, but in a bathroom with limited natural light, test the color before committing.

Do not overlook the ceiling, trim, and door. Yellowed trim beside freshly painted walls can make the update feel incomplete. Moisture-resistant paint and careful preparation are worth the effort in a room that sees daily steam and splashes.

Lighting is the next high-impact upgrade. Replace a dim, dated vanity fixture with one that gives clear, even light around the mirror. Brushed nickel, matte black, or simple chrome can modernize the room, but consistency matters more than chasing a trend. Choose a finish that works with the faucet, towel bar, cabinet pulls, and mirror frame.

Make Small Changes Look Deliberate

The most affordable bathroom updates should support a clear look. Once your tub, tile, walls, and lighting are working together, select accessories that add function without cluttering the room.

A new mirror can make a vanity area feel larger and more finished. Updated cabinet hardware gives older cabinetry a cleaner appearance. Coordinated towel bars, toilet paper holders, and robe hooks replace a mismatched collection of fixtures with a more polished look. These are small changes, but they are noticed every day.

Storage deserves attention, too. Bathrooms often feel outdated because counters are crowded with products. Add a simple shelf, medicine cabinet, basket system, or under-sink organizer so essentials have a place. Open shelving can be attractive, but it works best when you can keep it neat. In a busy household or rental, closed storage may be the more practical choice.

For fabric and decor, keep it simple. Fresh towels, a washable bath mat, and a shower curtain with a clean pattern can add color without creating visual noise. If the bathroom is being prepared for sale, neutral accessories are usually the safer investment because they help buyers picture themselves in the space.

Consider Accessibility Before It Becomes Urgent

A budget makeover should improve how the bathroom works, not only how it looks. For older adults, people with limited mobility, and families planning to stay in their homes, accessibility upgrades can be one of the most valuable changes to make.

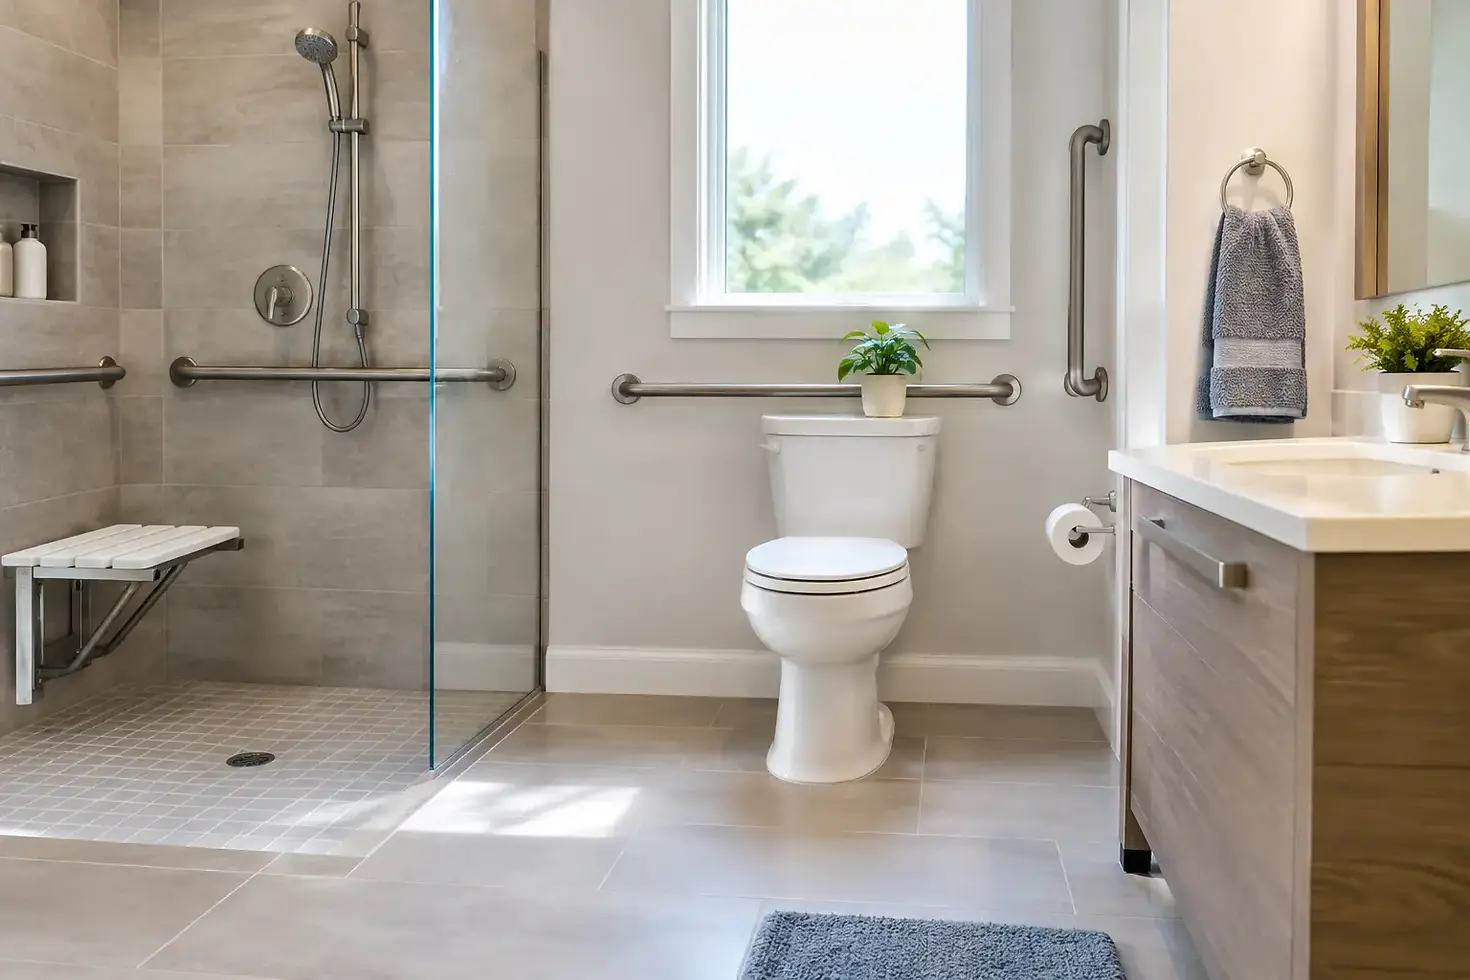
A tub-to-shower conversion can reduce the high step associated with traditional bathtubs and create a more convenient daily routine. It may require a larger investment than reglazing, but it can be a practical alternative to a complete bathroom overhaul when safety and ease of use are the priority. Grab bars, non-slip surfaces, a handheld showerhead, and better lighting can also improve comfort without changing the entire room.

The right decision depends on the household. A family with young children may want to keep at least one bathtub, while a homeowner aging in place may place more value on a walk-in shower. A good makeover solves the problems you have now while considering the ones you may have later.

Avoid the Budget Mistakes That Create More Work

Trying to save money by skipping repairs can lead to bigger expenses down the road. Do not paint over water stains without identifying the source, cover cracked grout without checking for moisture issues, or install new flooring over a soft subfloor. Cosmetic updates are most successful when the room is dry, safe, and structurally sound.

It is also wise to avoid changing too many finishes at once. A bargain faucet, inexpensive light, and clearance mirror may each look fine separately, but the bathroom can feel disjointed if the styles compete. Choose one simple direction and repeat it through the room.

Finally, be realistic about DIY work. Painting, swapping hardware, and organizing storage are manageable projects for many homeowners. Surface refinishing, chip repair, and grout restoration require careful preparation and professional techniques to achieve a durable, smooth result. Cutting corners on high-use surfaces can mean doing the work again sooner than expected.

A bathroom does not need to be gutted to feel new. When you restore the surfaces that are worn, improve the features you use every day, and make a few thoughtful style updates, the room can look cleaner, function better, and add appeal without turning your home into a construction zone. A free estimate from a qualified refinishing professional can help you see exactly how much transformation your existing bathroom still has left in it.


Those dark spots along shower grout are more than an appearance problem. Mold can make a bathroom feel neglected, hold onto musty odors, and spread quickly when moisture stays trapped around tile. Knowing how to remove mold from grout helps restore a cleaner-looking bathroom without turning a weekend cleaning project into damaged tile, faded grout, or ruined caulk.

The right approach depends on the condition of the grout. Light surface mold often responds well to careful cleaning and better ventilation. Deep stains, crumbling joints, missing grout, and recurring black growth may mean the surface needs professional regrouting or restoration rather than another round of harsh chemicals.

Start Safely Before Cleaning Moldy Grout

Open a window, run the bathroom exhaust fan, and wear gloves before applying any cleaner. If you are working in a small bathroom, consider wearing eye protection and a mask rated for cleaning fumes. Mold cleaners can irritate skin, eyes, and lungs, especially when used in an enclosed shower.

Never mix cleaning products. Bleach should never be combined with ammonia, vinegar, rubbing alcohol, or other bathroom cleaners. The fumes can be dangerous. Use one product at a time, rinse thoroughly, and keep children and pets out of the area until the shower is clean and dry.

Before treating a large section, test the cleaner in a small, hidden spot. Older grout, colored grout, natural stone tile, and worn caulk can react differently than newer ceramic or porcelain tile.

How to Remove Mold From Grout Step by Step

For most ceramic or porcelain tile showers, begin with a gentler cleaner. Spray the moldy grout with a bathroom cleaner designed to cut through soap scum, then let it sit according to the label directions. Soap residue gives mold something to cling to, so removing that buildup first makes the next step more effective.

Use a stiff nylon grout brush or an old toothbrush to scrub the grout lines. Work in small sections rather than spraying the entire shower and letting cleaner dry on the surface. Scrub with steady pressure, then rinse with warm water. Avoid wire brushes, steel wool, or abrasive scouring pads. They can scratch tile glaze, roughen grout, and create more places for dirt and moisture to collect.

If discoloration remains, choose a mold treatment appropriate for your tile and grout. An oxygen-based cleaner is often a good option for routine grout cleaning because it can lift stains without the strong odor of chlorine bleach. Apply it as directed, allow enough dwell time, scrub again, and rinse completely.

Chlorine bleach can brighten stubborn mildew staining on some sealed, light-colored grout, but it is not always the best first choice. Bleach fumes are strong, and repeated use may dry or weaken grout and caulk over time. It can also discolor colored grout and damage certain surfaces. If bleach is used, ventilate well, follow the product label carefully, and never leave it sitting longer than recommended.

After rinsing, dry the grout with a clean towel. This step matters. A shower that stays wet after cleaning can develop new mold surprisingly fast, even when the grout initially looks bright and fresh.

A Simple Paste for Light Surface Stains

For minor surface staining, a baking soda paste can provide gentle scrubbing power. Mix baking soda with a small amount of water until it forms a spreadable paste, apply it to the grout, and let it sit for several minutes before scrubbing with a nylon brush. Rinse thoroughly when finished.

This method is useful for maintenance, but it will not repair grout that is cracked, porous, or deeply stained. If the black marks return within days or weeks, the problem is likely moisture intrusion or failing grout rather than a lack of elbow grease.

Avoid These Common Grout Cleaning Mistakes

A clean bathroom should not come at the cost of damaged surfaces. Acidic cleaners, including vinegar, may be recommended online for mold, but they are not right for every bathroom. Vinegar can dull or etch natural stone such as marble, travertine, limestone, and slate. It may also weaken some grout over repeated use. If your tile is natural stone or you are unsure what material you have, use a stone-safe cleaner or ask a restoration professional before treating it.

Another common mistake is soaking grout lines repeatedly without drying them afterward. Grout is porous, especially when it is old or unsealed. Excess liquid can penetrate the surface and create the damp conditions mold prefers.

Do not ignore damaged caulk around the tub, shower pan, or corners of the shower. Mold that appears in these joints may be growing behind failing caulk, where surface cleaning cannot reach it. Scrubbing can improve the appearance temporarily, but replacement is usually the more hygienic and lasting solution.

When Moldy Grout Needs More Than Cleaning

Cleaning is a practical solution when grout is intact and the mold is limited to the surface. It is less effective when grout is missing, cracking, soft to the touch, or pulling away from tile. Those gaps allow water to move behind the wall or beneath the tile, creating a larger repair concern.

Watch for persistent musty smells, loose tile, discoloration that returns quickly, water stains on nearby walls or ceilings, or mold across a large area. These signs can point to an underlying leak or moisture issue. Address the source of the water before investing in cosmetic cleaning.

For aging bathrooms, professional tile regrouting can remove deteriorated joints and give the shower a cleaner, more finished appearance. It also helps improve hygiene by eliminating the cracked, porous areas where grime and moisture collect. When tile itself looks dated but remains structurally sound, refinishing can be a faster, more cost-effective alternative to full demolition and replacement.

Keep Mold From Coming Back

Once the grout is clean, prevention becomes the easiest part of the job. Run the exhaust fan during every shower and leave it on for at least 20 minutes afterward. If your bathroom has a window, opening it after bathing can help move humid air out of the room.

Use a squeegee or microfiber towel on shower walls after use, especially around corners and grout lines. It takes less than a minute and reduces the standing water that feeds mold growth. Hang washcloths and bath mats where they can dry fully, and avoid leaving shampoo bottles or shower caddies pressed against tile for long periods.

A monthly light cleaning prevents soap scum from building up again. If the grout is in good condition, sealing it can add another layer of protection against moisture and stains. Sealers do wear down, so they need periodic reapplication based on the product and how heavily the shower is used.

A Cleaner Bathroom Can Start With the Surface You Have

Mold on grout does not automatically mean you need a full bathroom remodel. Careful cleaning, reliable ventilation, and prompt repairs can make a noticeable difference in how clean and inviting your bathroom feels. But when worn grout, cracked caulk, or tired tile keeps undermining the results, restoring the existing surfaces may be the smarter way to achieve a fresh, brand-new look without the cost, mess, and downtime of replacement.

A bathroom should feel like a clean place to start and end the day. If regular cleaning no longer delivers that result, a professional evaluation can help you choose the practical next step - whether that is regrouting, refinishing, or repairing the areas that let moisture and mold return.


Bathtub rust removal

Ready to Refresh Your Property?

Whether you're updating hotel rooms, apartment units, or commercial bathrooms, Majestic Reglazing provides reliable refinishing solutions that save money while delivering outstanding results.

Request Your Free Estimate Today

📞 (551) 800-7174

Serving Commercial Properties Throughout South Jersey

bottom of page